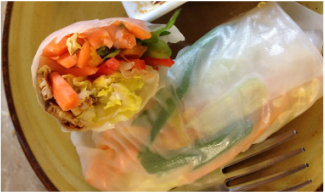
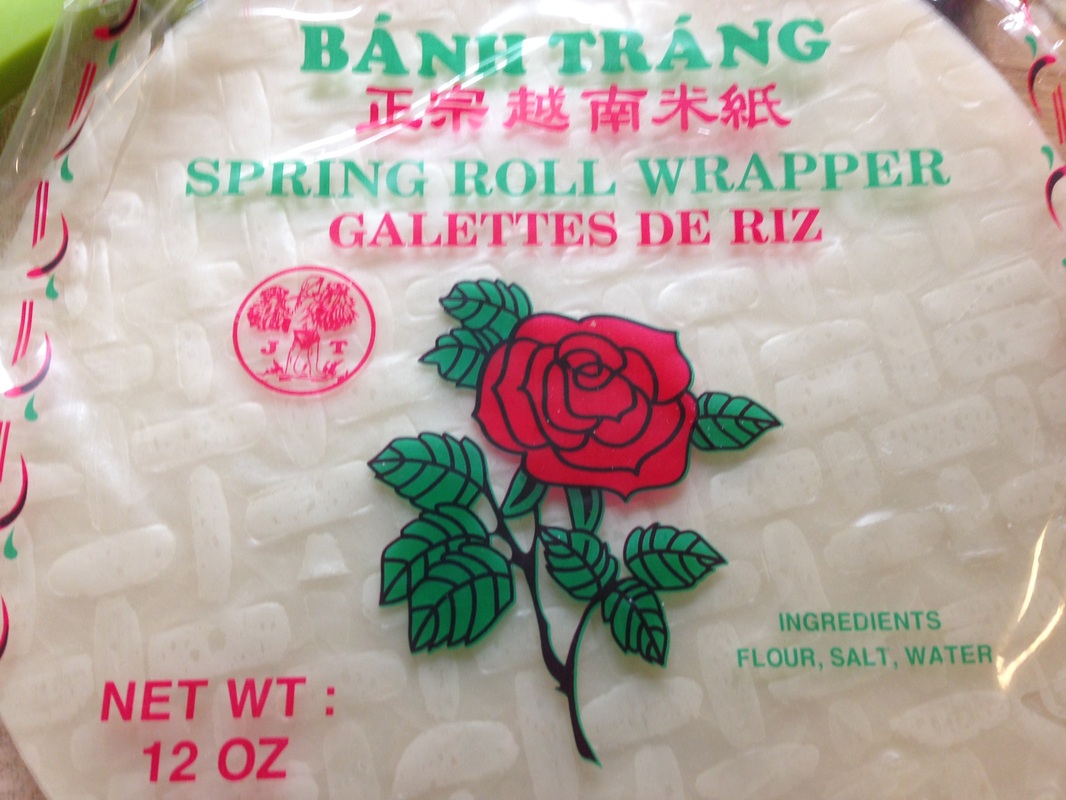
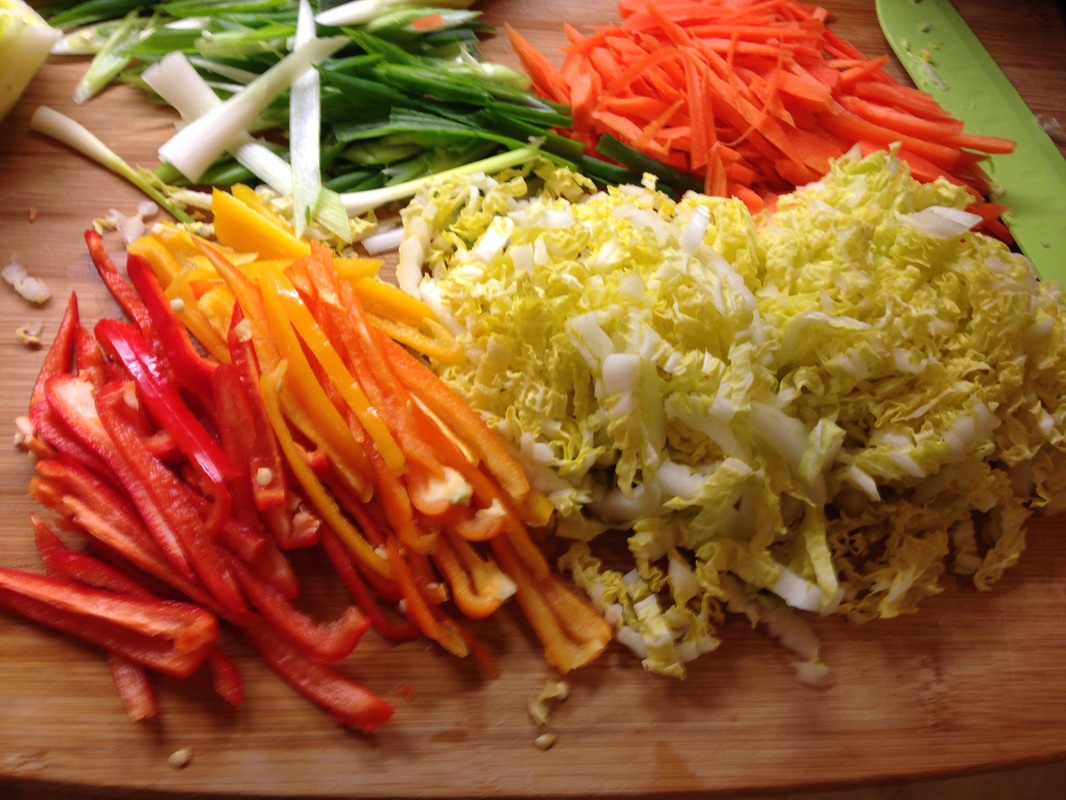
Today's post is not really original, but it's more of a recipe review. I am not sure how I stumbled upon this recipe for Cara's Crispy Orange Cauliflower on Vegan Richa's site, but I knew I had to make it. When I was an omnivore, one of my favorite take out meals was orange chicken. The last time I really remember having it was from that odd little Chinese place over on MacArthur in North Little Rock and it was 2008's election night. We grabbed take out and headed to Cathy and Garrett's for election results. So, I have a pretty strong affection for the dish This dish didn't disappoint. I rarely fry anything, but this is something I would definitely make again. The main thing I did differently was to just do all the sauce in the pan (rather than plating then dribbling). To go with it, I made summer rolls wit some stuff I had in the fridge: Thinly sliced Napa cabbage Strips of Vegan Yum Yum's Smoky Miso Tofu Strips of carrots Strips of tiny sweet peppers (the kind that come in the mixed bags Sliced green onions (strips sliced on the bias) I'm sure there are a million websites that teach you how to so ten ad wrap these rolls. The main thing I warn you of is that you don't want to get them too wet. It's one of those things that you probably just have to try first and find your groove. We had some Soy Vey in the fridge, so that became the dipping sauce. Hey, I'd just fried all that cauliflower. And, I had even made the Jazzy Vegetarian's Vegaroons for dessert, which are quite great.
0 Comments
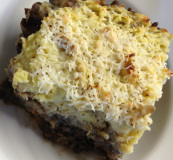
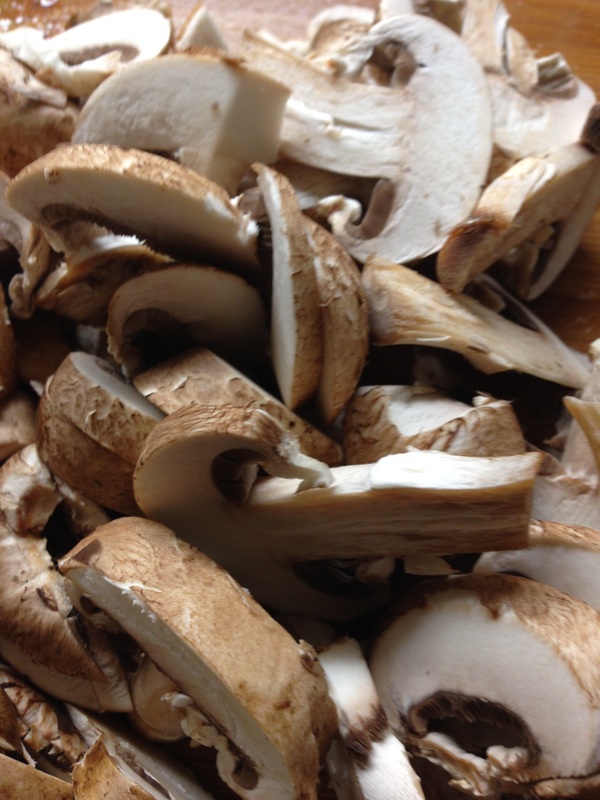
Let's face it. Some dishes are cover girls and others just have good personality. What you see above is my latest version of Shepherd's Pie (we took a vote at my house and decided singular possessive was the right way to do that). Loaded with tiny green lentils, carrots, onions, celery and mushrooms and topped with well seasoned mashed potatoes. Oh, and the picture above is "veganish" because I happened to have some good Parmesan in the house. If you wanted to substitute almond Parmesan or some other vegan cheese or even seasoned bread crumbs on top, I think that would work just fine. 1 cup rinsed, picked over french green lentils 2 1/2 cups water Put the lentils and water in a saucepan. Bring to a boil and boil for three minutes, then knock the heat back to a simmer, cover, and cook for 30 minutes. Once those are tender, strain them, but reserve the leftover cooking liquid. Add enough water to bring the liquid to about 1 1/4 cups. Stir in one heaping teaspoon or more of marmite if you have it. It gives a bit of beefy flavor. If you don't have marmite, you can use vegan vegetable bouillon (Not Beef or Not Chicken style) and feel free to replace the water with either a good red wine or stout or porter beer. The main thing is you want some flavorful juice to form a gravy later. Rinse your saucepan (no meed to be fussy about it). Put in water again and chop up 1 1/2 pounds of potatoes into 1 inch cubes. I used Yukon Gold, but really any kind, even sweet potatoes are fine. Put on to boil for about 10 minutes or until fork tender. These can be held in the water until time to mash. Spray or put a bit of your oil of choice in a skillet. Sauté the following (you can chop and throw in as you go--this goes pretty quickly: 1 diced onion (approximately 1 cup-ish) 1 cup diced celery 1 cup diced carrot 1 package of cremini (baby bella) mushrooms, sliced 3 cloves minced garlic (more or less to taste) 1/2 teaspoon dried thyme 1/2 to 1 teaspoon salt fresh ground black pepper Once everything is fragrant and fairly tender, throw the drained lentils in and just let everything get heated together a bit. Stir in your 1 1/4 cup of liquid, stir, and taste. 1 Tablespoon cornstarch 2 Tablespoons of water Stir these two together to make a slurry. Once your filling is up to a boil, stir the slurry in. It should only take a minute for the mixture to thicken to a gravy like consistency. Once the filling is ready, pour it into a casserole dish (or if you are using a cast iron skillet, just leave it in there. Why dirty another pan? Drain the potatoes. Add 1 Tablespoon of fat of your choice (I used olive oil for this batch) and add 1/4 cup of non dairy unsweetened milk (remember that almond milk I made the other day? That's what went in my potatoes). I seasoned mine with 1 1/2 teaspoons of Jack Stack all purpose seasoning (I need an intervention on this stuff) but any seasoned salt you have would be fine, or even just salt a pepper. Start mashing. You don't care if they are a bit rustic, but you do want them mashed and not too chunky. I left the peels on mine, but it's your dinner. Do what you want. Once they are the consistency of how you like your mashed potatoes, dollop them over the filling and use the back of a spoon to kind of smooth it out. I then took the tines of a fork and made little lines in mine to hold the topping of Parmesan. Making ridges helps ensure you get some browning. Bake in a 400 degree oven for 25-30 minutes until hot and bubbly. 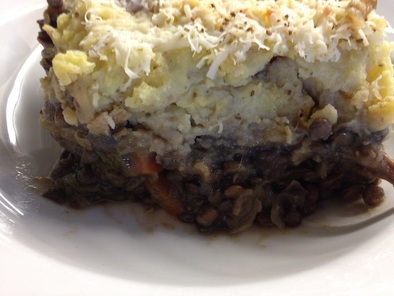
Tips:
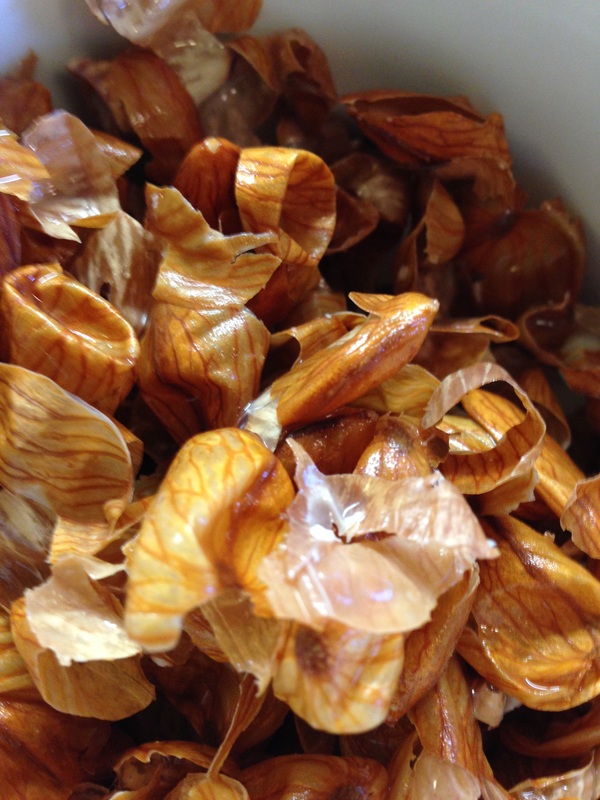
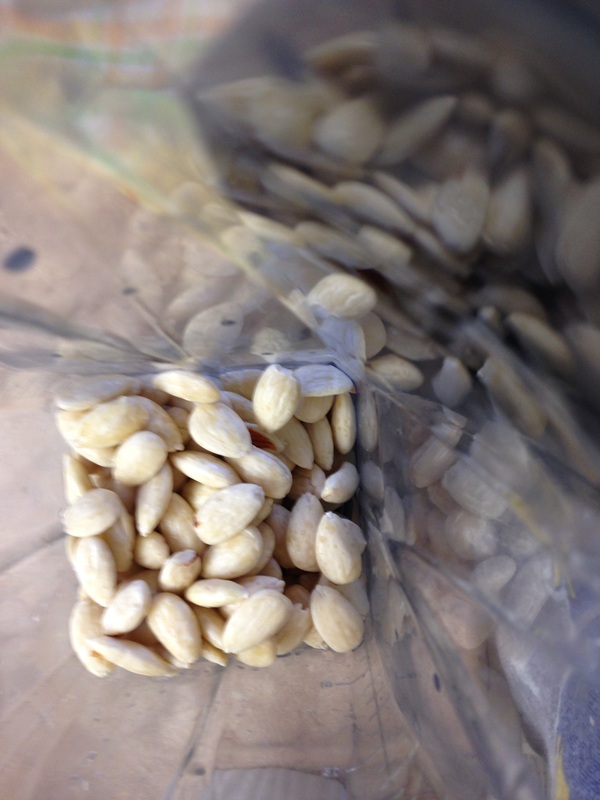
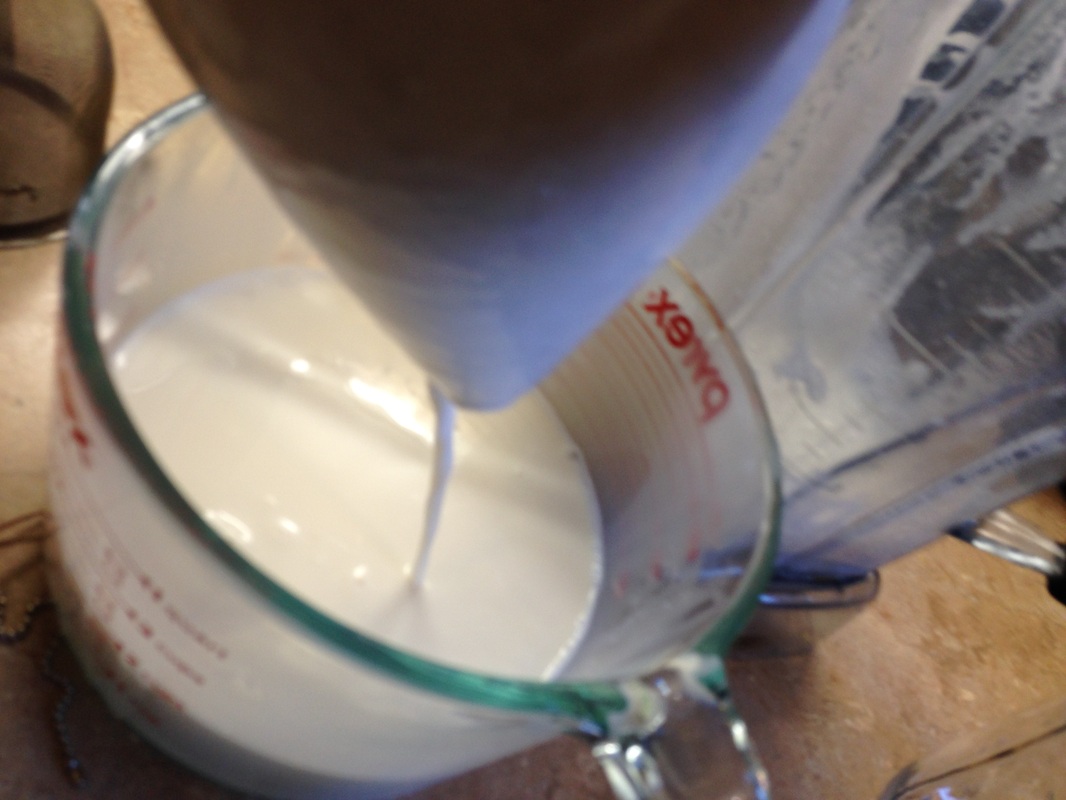
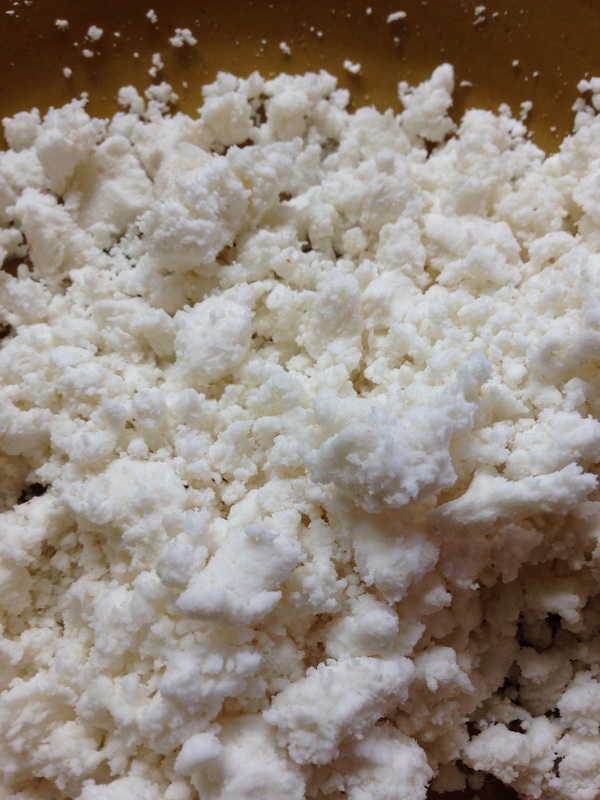
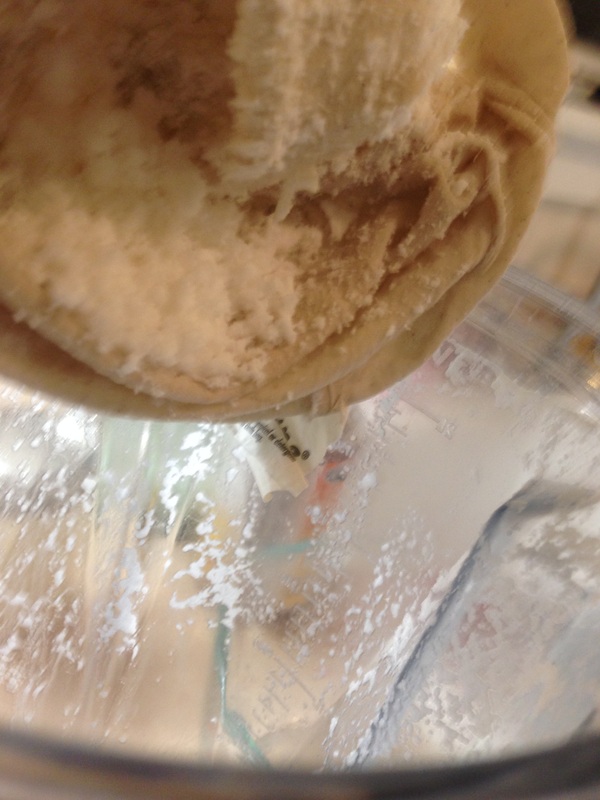
I had to travel to Michigan last week to do some on-site work. I totally had every intention of posting about dishes I had made in the past while I was out of town, either by using the recipes in reserve that I already have pics for or by reposting some things from my original site, but apparently I was so busy, even that didn't work out. I did get a ton of things accomplished, though, and I returned ready to cook up several things this week. The process here is similar to the coconut milk, but there are some variations. I soak one cup of raw almonds in boiling water. Once the water is cool enough that I can handle the almonds, I start peeling them. If you don't want to use the pulp for anything, you could skip this step, but I really prefer the texture of the end product best if the almonds are peeled. Most will slip out of their skins pretty easily, but you may need to start others by scraping the edge until you can pull off that skin. Alternatively, you could probably by blanched, skinned almonds. But I'm cheap. Throw the skins (picture #2) in your compost. Put the peeled almonds in your Vitamix, Blendtec, Ninja, whatever blender you use. Add four cups of filtered water and blend until there are no more audible chunks in there. Pour into your nut milk bag and get to straining! The last picture above is the pulp after lots of squeezing. 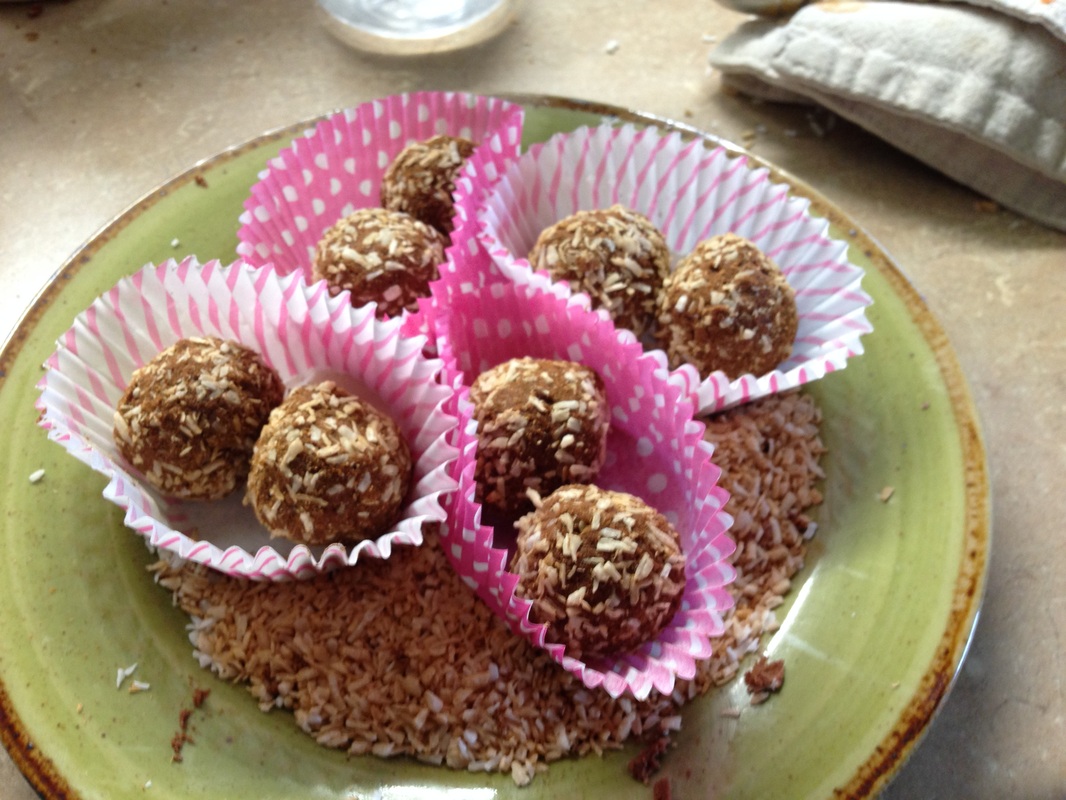
Don't throw that white pulp away. You can dry it for almond flour (although it won't have very much almond flavor), or you can use it as a base for truffles. Here's what I did to make the ones above:
Pulp from one cup of processed almonds (skins removed) 2 Tablespoons of maple syrup 2 Tablespoons of cocoa powder Pinch of sea salt 1/2 Teaspoon of vanilla Dash of smoked paprika (optional. Don't go crazy here if it is the hot kind. I used 1/4 of a teaspoon and could have used probably 1/2 of that.) I then rolled them in dry unsweetened coconut that had cinnamon mixed in. I just set up a public Facebook page for the blog. You can get there from the Facebook link near the search box (upper right corner) or by clicking here.
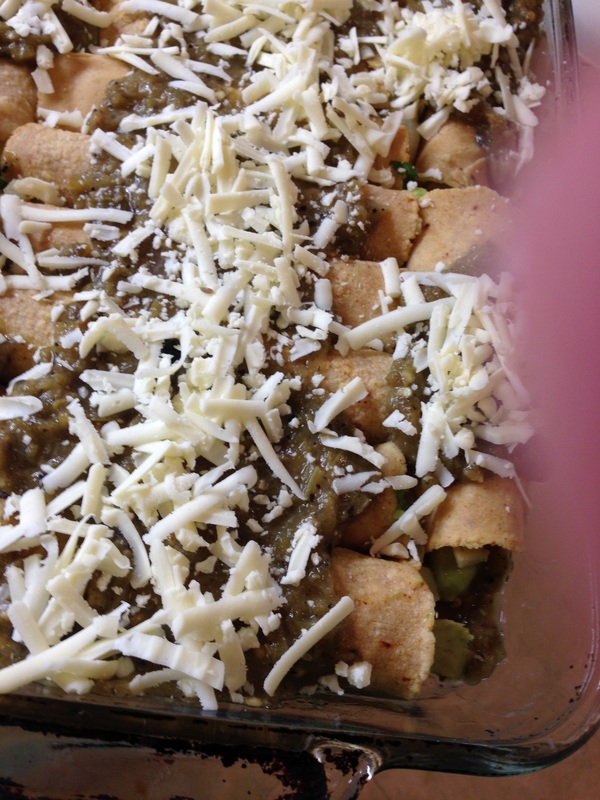
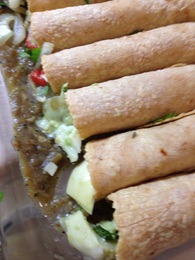 So, yeah, I gave you a two-fer the other day and then I disappeared. I planned on taking Wednesday off, but not yesterday. But then stuff to grade started flowing in. So, I've been pinned under the laptop for two days. Last night, I made my version of my favorite dish from Cantina Laredo. We got one in West Little Rock a few years before we moved and this was one of the few vegetarian friendly dishes on the menu. Even before we moved, I started making these at home. After all, you can make a huge pan for what a serving and a margarita cost to get over there, and you don't risk a DUI on the way home. Oh, and leftovers--you'll have leftovers. I'm going to give you the down and dirty easy recipe version first, then I'm going to tell you how you can make it harder :) Artichoke and Avocado Enchiladas Throw this in a bowl: 2 cans of quartered artichoke hearts 3 ripe but firm avocados (Hass, please), cut into slices Juice of 1 lime 1 roasted, peeled and seeded red bell pepper, chopped In a skillet, saute the following just until the onion is tender. (I do this at a pretty high heat in my iron skillet because I love char on the edges--sort of like a flash sear (I don't think that's a real word). But, you could just saute them at whatever temperature you feel safe): 1 yellow onion cut in half and then sliced into thin slices (think crescent shapes) 1 teaspoon or so of cumin seed 1 minced clove of garlic Pinch of crushed red pepper Throw the garlic and crushed red in just at the end. You don't want to burn either, but you do want them to get warm and cozy with the onions. When cooled to a temperature where you can handle them, pour the onions in your bowl with the other filling ingredients. 2 cans of green chile enchilada sauce (approx 14 ounces each) Warm the enchilada sauce in a sauce pan or in the microwave. Preheat your oven to 375. It's time to assemble. Gather a 9 X 13 casserole dish, your bowl of filling, 12 corn tortillas, the warm sauce. Spray or grease the dish. Put in just enough sauce to cover the bottom of the pan. Now it's time to roll! . 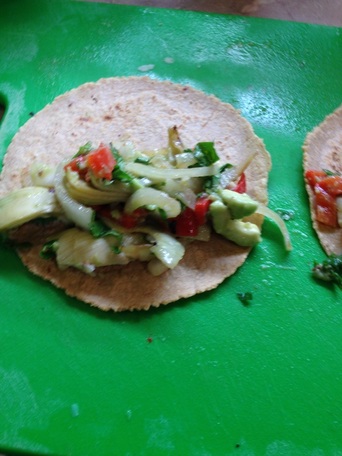 You probably will want to dip the tortillas in the warm sauce to make them pliable. The ones above were freshly made and held in a tortilla warmer, so they were pliable enough. If you don't want to dip in the sauce and you're using store bought, you can wrap them in a slightly damp kitchen towel and microwave them for a little bit. Like 30 seconds at a time, checking to see if they are floppy. And, as you can see, I snuck in some cilantro in ours (odd observation--apparently spell check does not think "snuck" is a word). I had some cheese that needed to be used, so that's about 3.5 ounces (yes, I weighed it). Shove the whole thing in the oven uncovered until your medical resident texts you and says she's coming home (or for about 30 minutes).
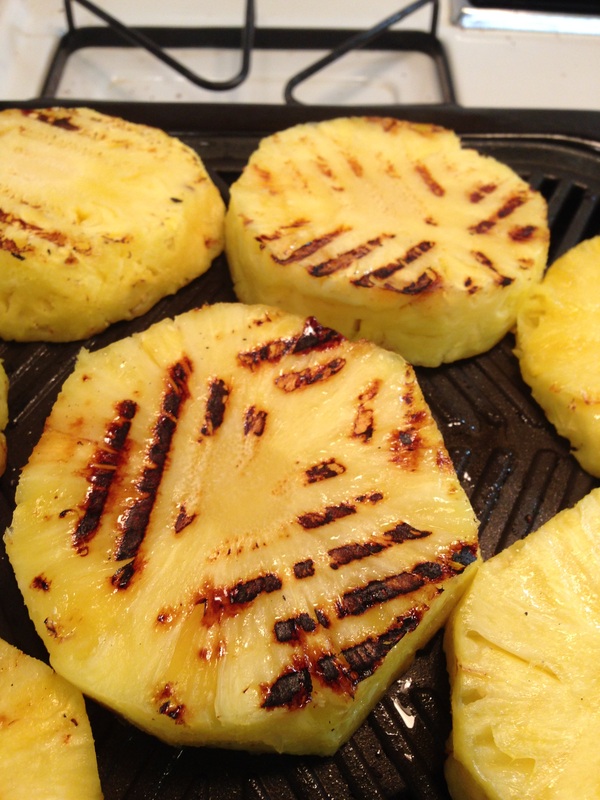
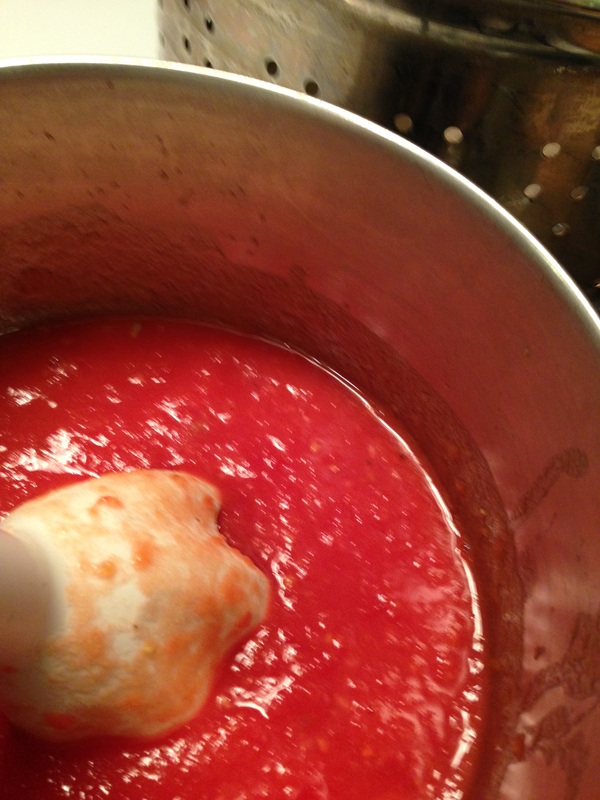
One time we were talking to our pal Kass and either D or I said something about roasting our own coffee beans and Kass was like, "Of course you were." I promise I've used the canned sauce and store bought tortillas, but last night those were from scratch. If you want to make it more difficult and time consuming, you can make your own tortillas and your own green chile sauce, which I did. I made the chile sauce earlier in the week to go with stuffed yellow squash, and I needed to use it up. As you can see, we had grilled pineapple on the side. 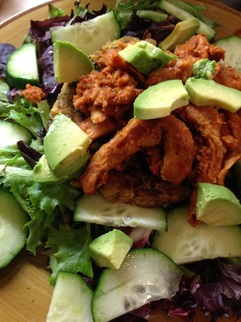 A few years ago, in preparation for a trip to New Orleans, I started looking for restaurants that served vegan food. Cafe Carmo was on my list of places to go, mainly because I read about this dish called the Vegan Rico. Those who had eaten it said it was listed as a sandwich but was more like a salad composed of a plantain patty nestled between a mess of salad greens and smoky, spicy vegan pulled pork all topped with avocado. On that trip, we decided to go to Bennachin instead, and it was glorious. But that's a different story. We've been back a few times since, but we have yet to eat at Carmo. After the first trip where we skipped it, I set about creating a dish that certainly sounds and looks like what others have described. Who knows it if compares? I suspect that they use jackfruit for their pulled pork, but I use these: 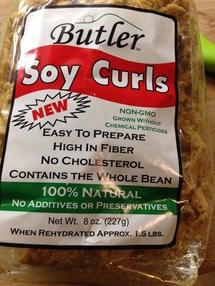 There is a lot to love about these Butler Soy Curls. The are non-GMO, for starters, and even better--they are made from the whole soybean. The beans are extruded at high temperature and pressure in a process that I assume is sort of like what happens at at Play-dough factory. And I mean that in the best way. I use these in a couple of different preparations. They are great as a stand in for chicken in dishes like chicken and dumplings, tortilla soup, or even stir fry. I'll show you some other time how I crisp it up for some applications (hint: it involves dredging in flour and spices after rehydrating and then running it under the broiler. Try this at your own risk and just don't burn it). For the Rico, I rehydrate it in plain water to cover. Once the water has cooled and the curls can be handled, I squeeze the excess water out and put them in a sauce pan with a sauce made thusly: 2 minced cloves of garlic 1 can of tomatoes and chiles 1/2 a diced onion chili powder cumin dash of hot smoked paprika salt and pepper juice of one lime 4 ounces of soy curls rehydrated and drained Saute the onions and garlic a bit to get some color on them and soften them. Add in the tomatoes and chiles, then add in the spices and the lime juice. Taste for seasoning and either run through the blender or use an immersion blender to smooth the sauce out a bit. You want the soy curls to be able to soak in some of that flavor. I deliberately am not putting measurements on the spices because I like things pretty spicy and if you get mild chiles and tomatoes you can put more heat in than if you buy the hot ones. Also, some folks might have a pulled pork sauce that they love, which I'd be all for them using here. If you are not comfortable with winging it, start on the low end--1/2 teaspoon of each, and work your way up. I've also been known to put in some dashes of hot sauce. Play with it, use your own loved sauce, do whatever. You can also throw the sauce blended into a slow cooker (without cooking first) and add a enough water to make the liquid cover your dry soy curls. You can skip the rehydrating if you do them on the stove top, as well, but they tend to hold a bit of the dehydrated flavor if you do that (I know, dehydrated flavor doesn't really make sense, and I'm not even sure it's not just in my mind, but I'm sticking with the phrase). You want the finished pulled curls to be juicy, but not runny. I finished the batch you see in the final dish above in a non-stick skillet, cooking down the sauce until it wasn't watery at all. The sauce gets a bit caramelized on the curls that way, sort of like they do in the slow cooker on the edges. Go with it. 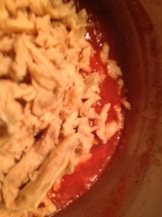 The plantain patties might be a bit of an adventure if you've never had or cooked with plantains before, and if you'd rather not, you could substitute sweet potatoes for an equally yummy dish. I should come up with a name for that version. Plantains are great, though, and are wonderful sources of potassium. The patties could be used as a side dish, as they are great on their own. So, today you are getting two recipes you can use in different applications. I like a two-fer. Plantain Patties
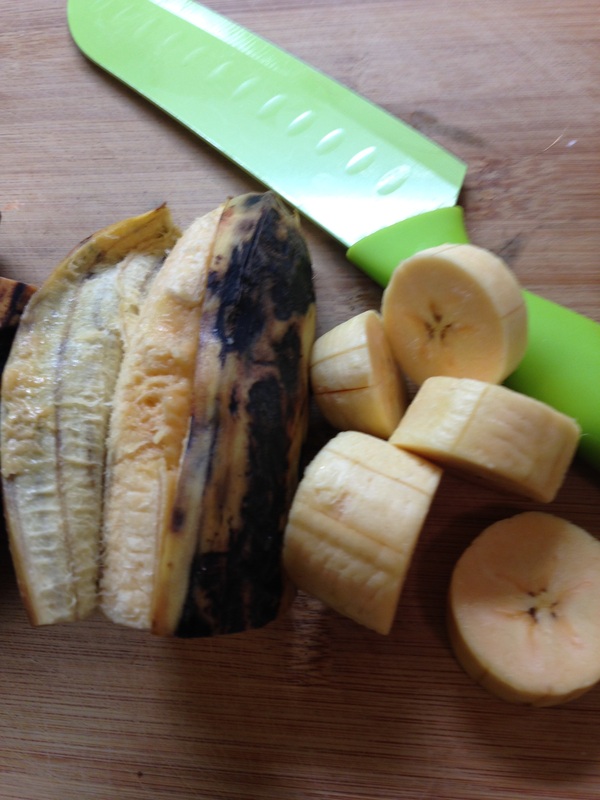
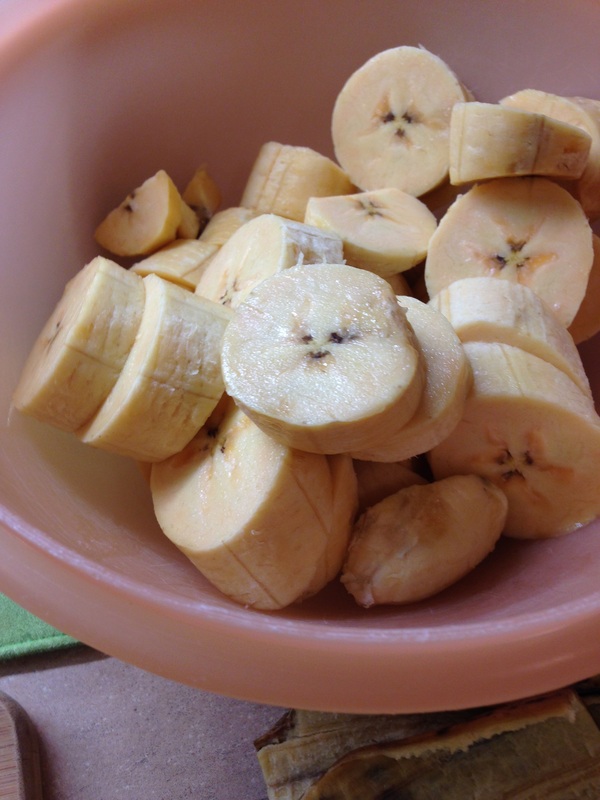
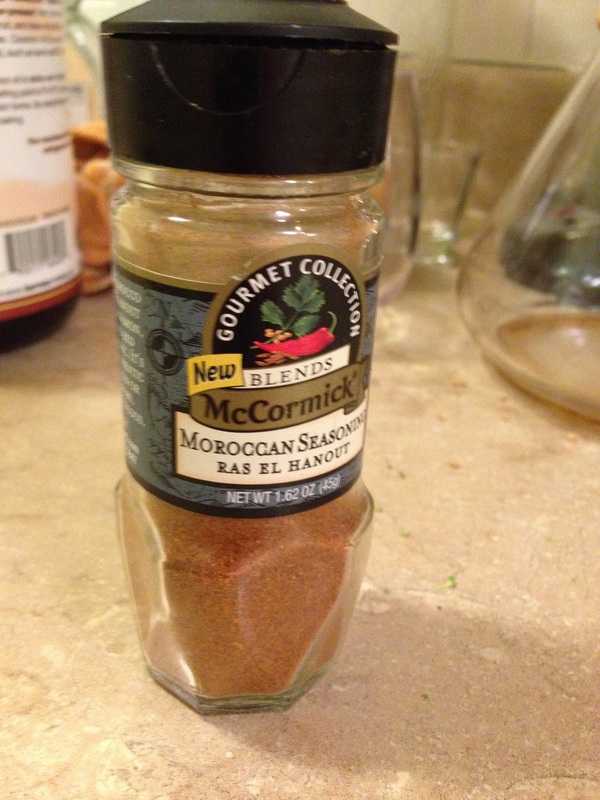
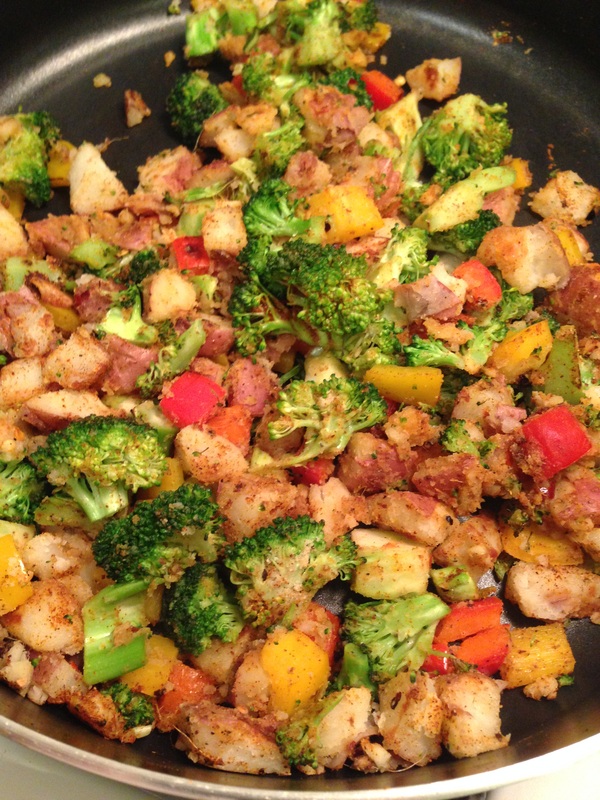
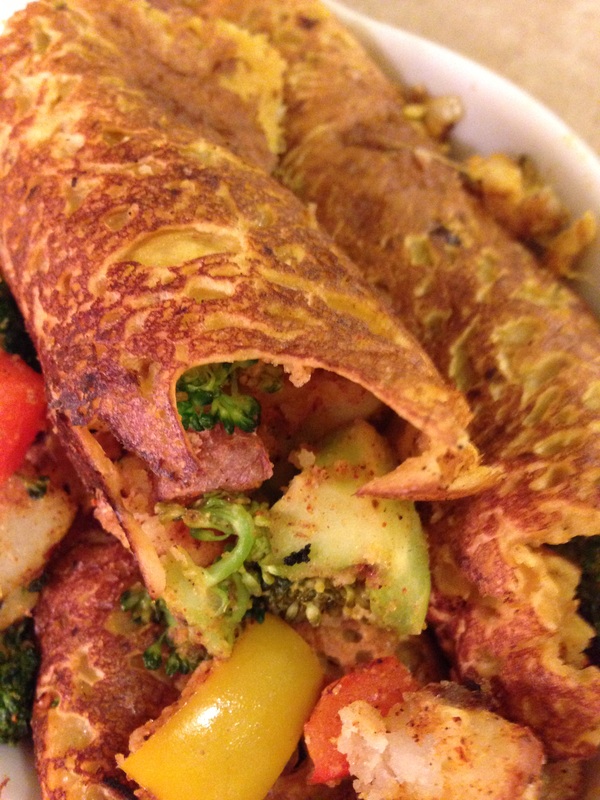
3 fairly ripe plantains 2 cloves of garlic, minced 1-2 seeded and chopped jalapenos (you know how hot you like it) 1/4 cup chopped cilantro or parsley 1/4 cup flour (I use white whole wheat but you can swap out with a gluten free flour easily) 1 teaspoon of baking powder Select plantains that are fairly ripe. As you can see from the picture above, they should have some good black spots on them. To peel, cut the ends off and then cut in half. Slice through the peel as shown above and peel it back. Slice the peeled plantain into rounds and put in a microwave safe bowl. Microwave for about 6 minutes or until soft enough to mash. Once the plantains are cool enough to squash with your hands, go to town mashing them up (you can use a potato masher if you like). Add the remaining ingredients and mix together. Shape into four equal sized patties and brown in a non-stick skillet prepped with oil or cooking spray until golden brown. Plating Spread out some spring mix on a each of four plates. You can add whatever you like in a salad here. As you can see in the first picture, I put in some cucumber and bell pepper strips are also a nice addition. Place a patty on top of the salad, then top the patty with your soy curls and avocado slices. A healthy squirt of lime juice should do it. 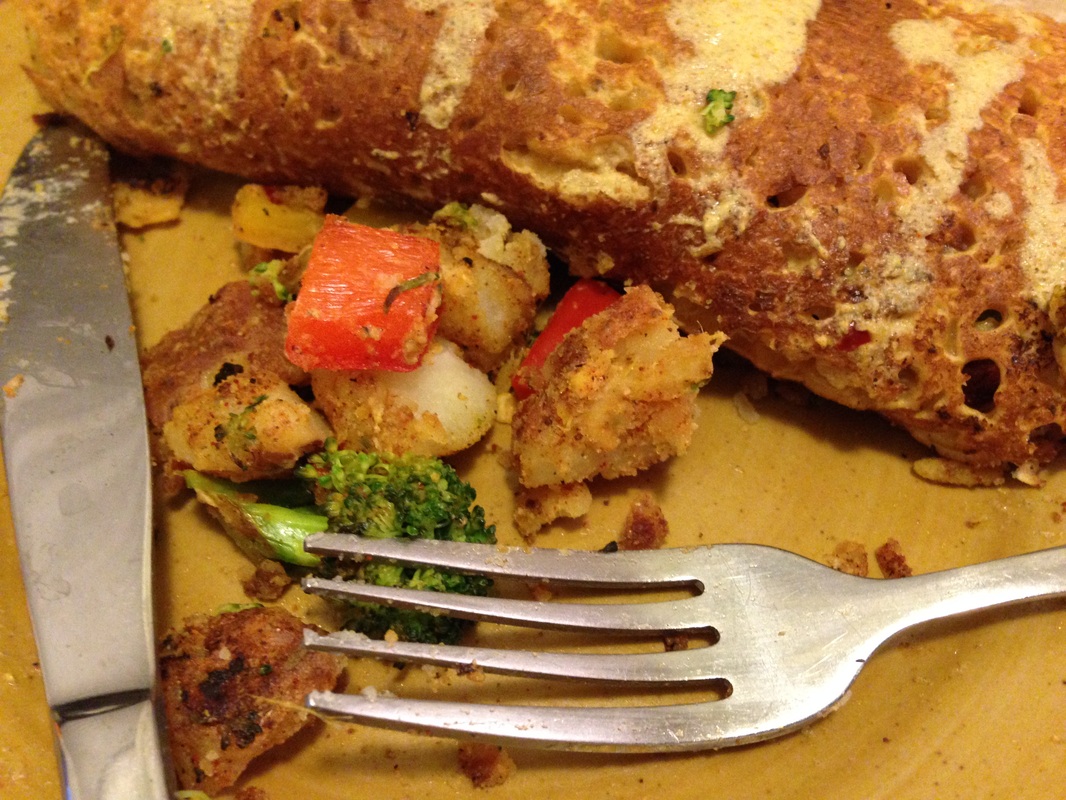 I've had this dish in my head for a few days, and finally got it together Friday, making it a less than lazy day. This dish is gluten free and vegan, and it is adaptable. The crepes alone are great as a bread side dish or even as an alternative to an omelet. Fresh herbs like cilantro or some finely shaved/sliced green onion tops would go great in the batter, too. Chickpea Crepes Makes approximately 7 crepes Adapted from Moosewood Cooking for Health Whisk together in a bowl: 1 cup chickpea flour (also known as Besan) 1 cup water 1/2 teaspoon salt 1/4 teaspoon of turmeric 1/4 teaspoon smoked paprika (I used the hot kind. If you don't have this, cayenne works just fine) 2 teaspoons grated ginger root (fresh) In your small skillet that you'll be cooking crepes in heat 1 Tablespoon of oil and add in 1/2 teaspoon of cumin seeds, 1/2 teaspoon mustard seeds, 1/2 teaspoon of coriander seed, and 2 minced cloves of garlic. I like to rough chop the seeds with the garlic on my board before putting in the oil. When this is fragrant and the seeds start to pop a bit, pour this into the batter. Swirl 2-3 tablespoons of batter in your pan at a time (you'll want to spray the pan between crepes). Put a lid on while cooking the first side. Once the crepe seems fairly dry and bubbles have formed on top, flip and just cook for a minute or so on the second side. Repeat. I put mine in a tortilla warmer as I cook them so they stay pliable. Moroccan Hash 5 smallish red potatoes, washed with skin on (you want about 2 cups diced) 1 cup diced bell pepper 3 cups chopped broccoli 2 cloves minced garlic 1 inch or so of peeled, minced ginger root Pinch of crushed red pepper 1/2 teaspoon of salt 1/2 medium onion, chopped 1 teaspoon garlic powder 1 teaspoon onion powder 1 teaspoon of Ras el Hanout Juice of 1/2 lemon Put the whole washed potatoes in a microwave safe bowl and microwave for 5-6 minutes or until tender. If you don't wish to microwave them, you could go ahead and dice them and par boil them just until they are tender. Once they are tender and diced, put them in a pan to brown with the chopped onions (if you have a non-stick skillet, you can get by with very little oil). Once the potatoes have some color, add the other vegetables and stir together. Add the spices and garlic/ginger, as well as the lemon juice and cover for a couple of minutes. Depending on how cooked you want your vegetables, you may want to cook longer, but I prefer just cooked. Moroccan Sauce Adapted from FatFree Vegan's recipe here. 1/4 cup cashews, soaked and drained 1 1/4 cup unsweetened coconut milk (I used the leftovers from my earlier tutorial) 1 Tablespoon chia seed 1 teaspoon garlic powder 1 teaspoon onion powder 1 teaspoon of dried parsley 1 teaspoon Ras el Hanout juice of 1/2 lemon Place all ingredients in a blender and blend until smooth. Note that this is a fairly thin sauce. If you want a thicker sauce, you could cut back on the coconut milk. You might start with 1/2 a cup and add to desired thickness. To assemble, put about 1/3 cup of hash in each crepe and roll it up. Serve with sauce. I am mainly cooking/eating other people's food today, as I slept in and Dani is out with the other first years for dinner tonight. I did start the day with one of my favorite smoothies, though:
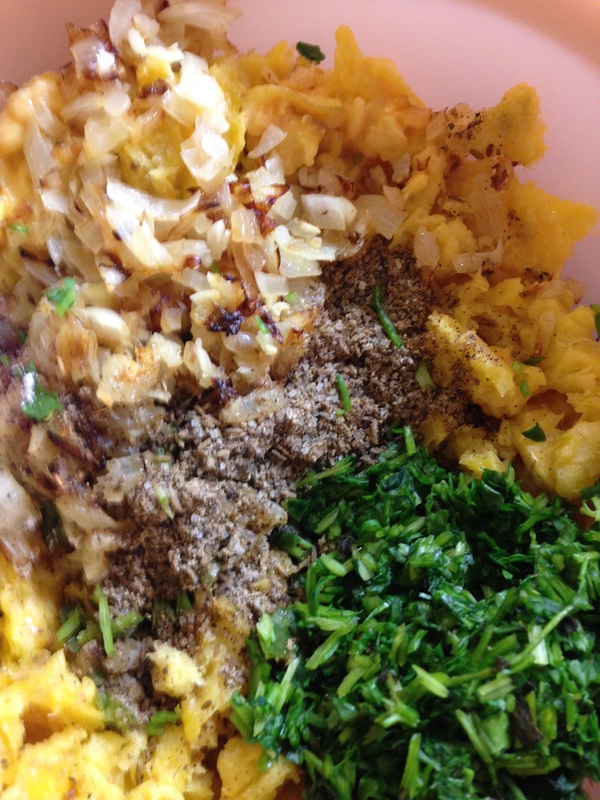
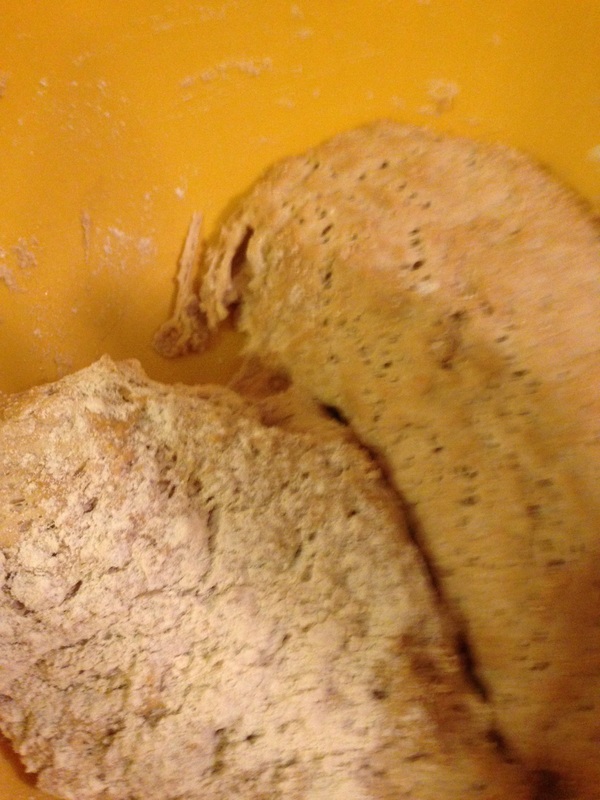
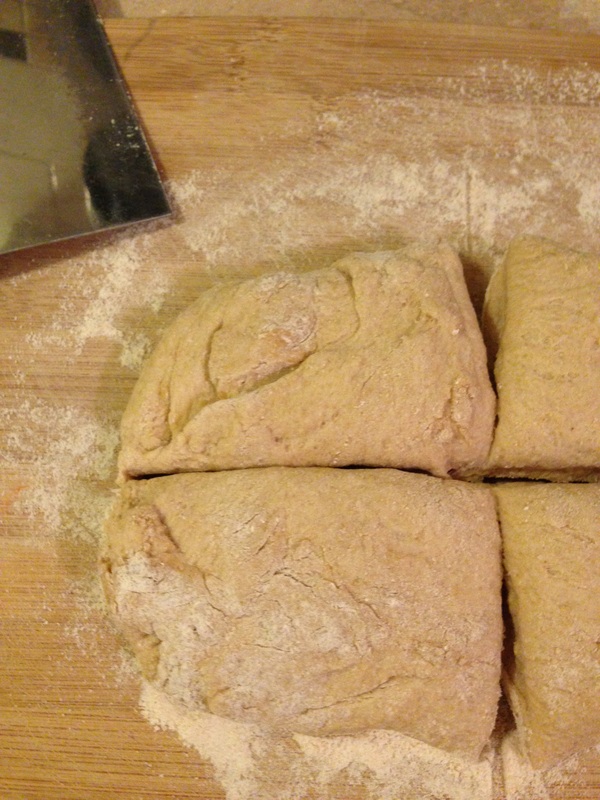
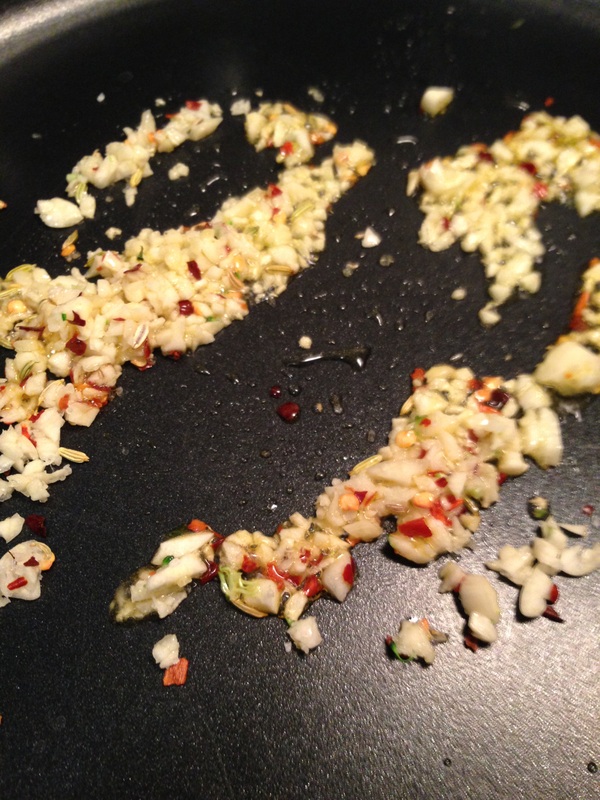
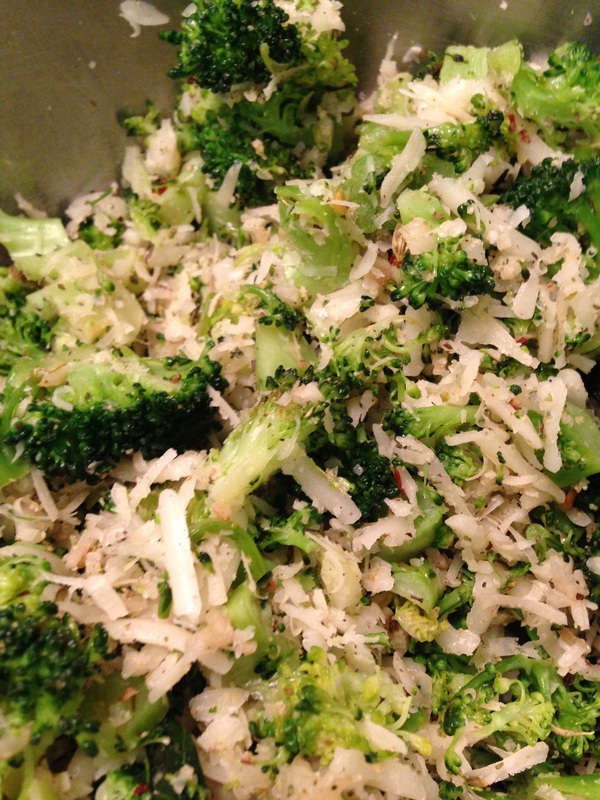
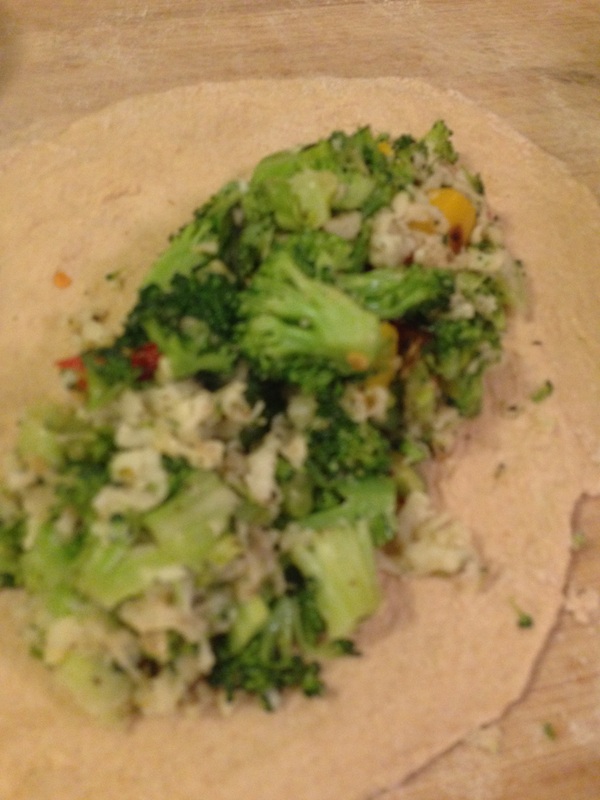
1 banana 2 Tablespoons each of almond butter and cocoa powder 1 cup of plant-based milk (I used vanilla soy today) Squirt of stevia (you might not need this, depending on how ripe your banana is) 3-4 ice cubes Throw in the Vitamix and let'er rip. This could easily be two dessert servings, but I do like it for a breakfast treat all of my own. I especially like that there's no protein powder here, as the almond butter takes care of that requirement. And, cocoa powder is high in antioxidants. Don't judge me. Lunch today was a salad topped with a little "cheeze" sauce (I adapt the Simply Heavenly version by halving the recipe, leaving out the margarine and adding things like chili powder and hot sauce) and a tiny bit of guacamole I had left from dinner and that wouldn't fit in Dani's lunch (she's having black bean tacos for lunch). I pulled a couple of Josh's Black Bean Burger patties out of the freezer, thawed in the microwave and then crisped them up in a non-stick skillet. They went on top of the salad. Instant lunch. I'm not sure what dinner might be, but I am thinking it might be a trial run of a recipe for chickpea crepes filled with roasted broccoli and new potatoes. My main experiment there is finding the perfect sauce to serve drizzled nearby. I may play with this base, using curry spices instead of ranch. Since I have cooked black beans from yesterday, I'm also going to be giving these a try: Dr. Fuhrman's Fudgy Brownies. A lot of folks complained they had to add water, so I'm going to soak my date pieces before hand and have the soaking water on hand. I'll let you know how it goes.  Today's recipe is definitely "veganish"--the version you see above is not vegan because I used actual cheese, but you could easily veganize this one with little trouble. Simply swap out the mozzarella with Daiya or some other vegan shred and the Parmesan could be swapped out with a vegan parm (you can even make your own using FatFreeVegan's Almond Parmesan recipe). There are lots of recipes out there for vegan ricotta cheese and mozzarella, as well as Parmesan. You could even go with a Pangrattato AKA "Poor Man's Parmesan" (see this favorite that I've veganized in the past and will again sometime on this blog for a fancy breadcrumb substitute for the Parmesan). This is a recipe in three parts. I made a whole wheat crust from my adaptation of the no-knead bread dough from Healthy Bread in Five Minutes a Day, which has the Master Recipe posted online. This recipe calls for a mix of AP and whole grain flour, but my adaptation is all whole wheat (the softer, white whole wheat). The small amount of added oil and sweetener help soften the texture. I use this for pizza crust (I generally get two crusts out of the batch of dough below, but if you're into deep dish, your mileage will vary). I also make pitas with it (oven temperatures and dough prep make a difference, but that's a tutorial post). I also want to note here that this would normally have actual onion in the filling and the sauce, but I had one onion in my kitchen and when I cut it open it was nasty (there's always one in the bag, isn't there?). So, feel free to use onion if you have it and consider leaving out the onion powder, although I find that it does add some different type of onion flavor and sweetness. It's a handy pantry item to have. Virtually no knead bread Adapted from Healthy Bread in Five Minutes a Day 3 3/4 cups White Whole Wheat Flour* 2 Tablespoons of Vital Wheat Gluten** 1 Tablespoon of active dry yeast*** 1.5 teaspoons (1/2 T) of salt 2 cups warm water (not hot--don't kill your yeast!) 1 Tablespoon agave, honey, maple syrup, or sugar 1 Tablespoon extra virgin olive oil Put the dry ingredients in a bowl. Stir the wet together in your mixing cup (I often dissolve the salt in there too). Stir the wet into the dry. I generally use a spoon for this, just making sure I stir until all of the loose flour is worked in. I have been known to grab the dough and roll it in the bowl to get the last bits. You'll have a somewhat shaggy dough that seems too soft. It's not. Cover it with a kitchen towel or with plastic wrap and leave it alone in a warm spot in your kitchen for two hours or until doubled. As you can see in the middle picture, the dough will show air pockets when it's ready to go. *If you have a Kroger nearby, their brand is awesome and about 1/2 the cost of King Arthur and slightly less than Gold Medal. If I have a choice between KA and GM, I go with KA, even though the price is higher. The texture is lighter. I would not go with all regular whole wheat here (the old-school kind) just because of the texture. White whole wheat has the same fiber and nutrient density of whole wheat with a much lighter texture. I use it in place of AP flour these days. **Vital wheat gluten is the protein part of wheat flour. It's what seitan is made of! It is also used in a lot of commercial baked goods as it not only helps ensure a better structure to the bread but it also extends shelf life. Obviously, if you are gluten intolerant, this recipe is not for you. ***I prefer SAF Instant Yeast or Bob's Red Mill Active Dry Yeast. I keep mine in a jar in the refrefrigerator. If you buy single packets of yeast, this is a bit more than a single packet, but less than two packets. I would go with one packet and simply extend the rising time. If you bake a lot, though, I'd say get the big bag of yeast. It's cheaper and I get better results from it. It lasts a good while in the refrigerator or freezer. Calzone Filling 1 teaspoon of olive oil 2 cloves of minced garlic pinch of crushed red pepper pinch of fennel seed pinch of salt Put the olive oil in a non-stick skillet and heat the spices and garlic in it until fragrant. Then, add: 4 cups chopped fresh broccoli (or frozen if that's what you've got) 2/3 cup to 1 cup of diced bell peppers in color(s) of your choice (these can be frozen to, if necessary) 2 Tablespoons of water Stir this around a bit and cover. Let steam for approximately 5 minutes. Allow this to cool and add to a mixing bowl that contains: 4 ounces of shredded, part skim mozzarella (or vegan sub) 1 ounce (1/3 cup) shredded Parmesan cheese (or vegan sub) 1 t. garlic powder 1 t. onion powder 2 t. Italian seasoning Salt and pepper to taste While this cools and your bread dough is doing its thing, make this simple marinara: Olive oil for the pan (1 teaspoon or less) 2 cloves minced garlic (I know, I can't use just one) pinch of fennel seed pinch of crushed red pepper 1 Tablespoon of onion powder 1 teaspoon garlic powder 1 Tablespoon of Italian seasoning 2 cans of diced tomatoes and their juice 2 Tablespoons of balsamic vinegar (get something that is at least as good as Pompeian brand, but you don't have to use your crazy expensive stuff) Saute the garlic, fennel and red pepper with a little salt like you did before. Once that is fragrant, throw in the tomatoes and hit it with an immersion blender (you can see mine above). If you don't have an immersion blender, puree the tomatoes first, then add to the pan. This results in a slightly chunkier texture than just opening a can of tomato sauce, but if that's all you've got, make do. Add the dry spices and vinegar and taste it. Add additional seasonings (salt, pepper, more heat) and let this simmer on low for a bit. Put a lid on it so you don't get tomato splatter. Assembly To assemble, divide your dough in half, as shown in the picture above. Put half the dough on a floured board and divide this into fourths. Roll each ball out into an oval and place approximately one cup of filling along the inside. You can kind of shape this where you want it on the dough. Pull over one side, gently and tuck the edges. Place on a greased baking sheet. I got five calzones out of this recipe, but you may be able to get all of the filling in just four, depending on how thin you roll out the dough and so on. Five is a lucky number, though, and who doesn't want an extra calzone to split later? For number five, I just took my second blob of dough out, divided in fourths, and balled the 3/4s of dough together and put in a zip lock bag that went in the fridge. Now, anytime this week or so that I need a small baguette or some breadsticks, I can just use that dough for that. Awesome, huh? Spray with a little olive oil and cover with your kitchen towel. Let rest for 20-30 minutes as you preheat the oven to 400 degrees. Bake for 30 minutes. 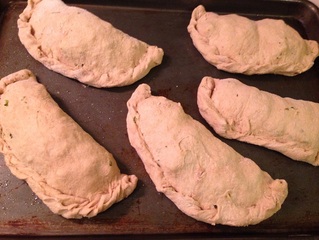 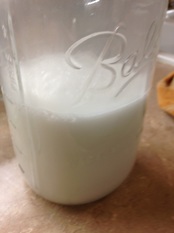
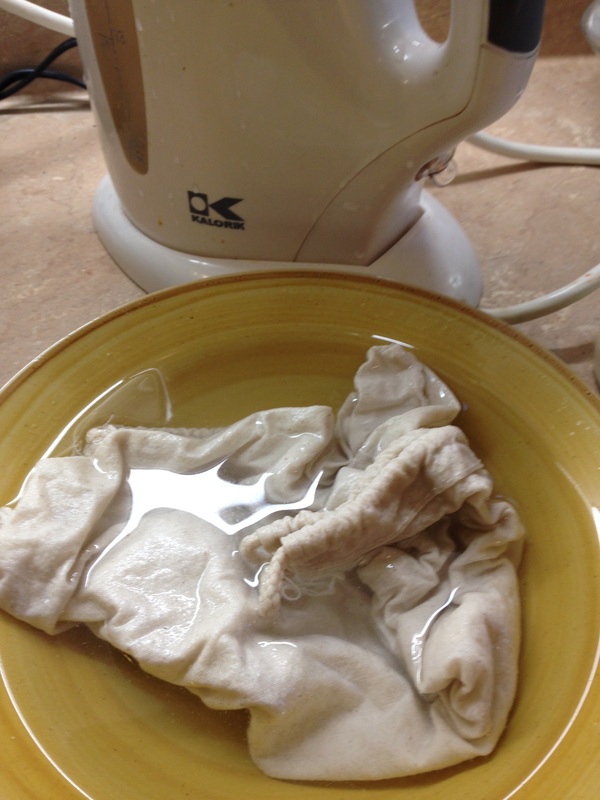
I love coconut milk for cooking, but it is so expensive by the can. What you'll learn to make from this tutorial is more akin to the "light" coconut milk in a can than it is the full tat canned version. You could easily cut back on the water to make a fattier version, but this version works great in curries or for baking. Here's what you need: 1 cup unsweetened shredded coconut 4 cups filtered water a nut milk bag (paint strainer bag, clean kitchen towel, whatever works) Blender That is it! Obviously, you can add sweeteners (vanilla and some whole dates, for instance if you want a drinkable, cereal ready milk).  The process I use here is to boil the water and then measure out three cups to add to the one cup of coconut. Just let it hang out there until the water is fairly cool. While that is hanging out, I soak my strainer bag in filtered water (see below). I do this not only to make the bag more pliable but also in hopes of getting rid of any residue that might linger from the last use or the last run through the washing machine. I then throw the cooled coconut and water mix in the Vitamix and ramp it up to ten then to high for a count of 60.  I'm a messy cook, so I put my bag in my jar that I'm using to store the milk. Pour into the jar and "milk" the bag. I just gather the top and start twisting. Since the bag is in the jar, there are no splatters here as you strain the milk. Dump the pulp back in the Vitamix. Add another cup of water and give it another run through and strain this. You'll wind up with very little pulp, maybe a 1/2 cup, once you've strained it well. I've dried the pulp at this stage and ground it into coconut flour, but I have yet to experiment with using it. You can always compost it. So, there you have it--my basic coconut milk for cooking. I use this version in curries, stews, and cornbread, as well as in coconut rice. I have made a a cup or so at a time and left it unfiltered for use in coconut rice (blending well, adding water to bring to two full cups to cook one cup of rice in the rice cooker), and found that it works fine that way with no waste (the leftovers were even better than the first run straight out of the cooker).
I also make almond milk in much the same way (same proportions) and often make oat milk for baking that is lower in fat. With the oat milk, the water can be room temperature and I do a single run through and strain through a fine strainer. Trey the dog loves to eat the oat bran pulp on his food and seems to think it's a treat. |
Who's dishing?Angel lives in Camden, Arkansas where she writes stuff and sometimes sends it out to other people to read. She used to grade papers, but not anymore. Check out her main site to see what she's up to lately. 
Archives
November 2017
Categories
All
|


 RSS Feed